Category: IoT

  • The Popcorn Effect on MSL 1

    The Popcorn Effect on MSL 1

    A little break in Firmware development to help my client, an IoT start-up, diagnosing The Popcorn Effect. Something I’ve never seen with my own eyes before. The Popcorn Effect is a direct consequence of Moisture entering the IC before the reflow process. A common problem in Electronics Manufacturing.

    Production and Testing

    It all started on the assembly line, the IoT product is a kind of thermometer. The production has just started and the first pieces have arrived, ready for testing. One of the test consists of heating the thermometer up to 95°C, repeated 3 Times. It all worked fine up to 40°C when suddenly the software indicated 0°C for 9 of the devices. You would think they all worked fine until they reached that temperature. Some even recovered when cooling down.

    Inspection

    A first visual inspection of the PCBA by microscope doesn’t show any defect, all components are populated properly.

    Measuring the power supplies: it seems like it’s all fine.

    The sensor

    The temperature sensor is the TI TMP-100-Q1, connected to the host controller via I²C.

    Next step, how does the I²C CLK and DATA look like?

    They both look fine, except the data is always HIGH. So returning 0xFFFF to the app which represents -0.0625°C and then displays the nearest integer, 0°C.

    A closer look

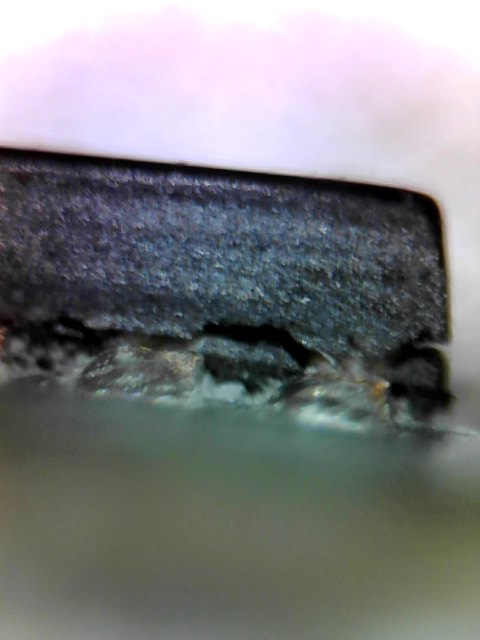
    A closer look with the microscope and yes, here we go. The IC is cracked at its base. Some chips present a slight crack between 2 pins, others show a very clear crack around the corner.
    The Popcorn Effect

    Because moisture found it’s way into the package and expanded in the reflow process, the IC pops like a popcorn.

    Manufacturers deliver the ICs in a sealed package if they are sensitive to moisture. MSL is the Moisture Sensitivity Level, provided by the manufacturer. This indicates how many hours an IC can be exposed to the ambient air before it needs to be baked to escape the trapped moisture in preparation of the reflow.

    The TI TMP-100-Q1 has an MSL 1, which generally means no particular precautions need to be taken. Despite this, level 1 does specify some limits. This example proves that from the chip production to the PCB reflow in Asia, moisture can affect the production even with a MSL 1 rated chip.

    Consequences

    In our case, most ICs stopped working, some only at higher temperatures, some recovered when cooling down. Imagine how many hours could be spend looking for a software bug on something as sporadic as that!

    Action

    The PCBA manufacturer has been notified of the issue and will cook all of these ICs before reflow. This is a standard process that consists of extracting moisture / drying the ICs for many hours at moderate temperature.
  • Hands on TI CC2640R2F

    Hands on TI CC2640R2F

    This is my first experience with CC2640R2F and also with TI more generally so I thought I’ll write down my feelings after a week as it might be of interest to someone else.

    Background

    I should mention that this was my very first time developing with TI, which means most of the comments concern TI more than the CC2640R2F specifically. I have been developing with other brands like Atmel, Microchip, Motorola and Cypress so there will be some kind of comparison with them.

    Goal and expectations

    I’ve been given a week to evaluate the CC2640R2F and try to estimate the required time for achieving the corresponding project. The accent is put on the capacity to connect up to 4 peripherals and one client. The connection needs to automatically be established and reconnected if disconnected.

    The chip

    The TI CC2640R2F is an improved version of the famous TI CC2640. The main difference is that the radio stack stays in an added ROM memory. This leaves more flash space for the user application. The chip is also ready for Bluetooth 5.0 once the Stack and SDK will be released. The main difference on this is a reduced link budget for an extended range, perfect for IoT.

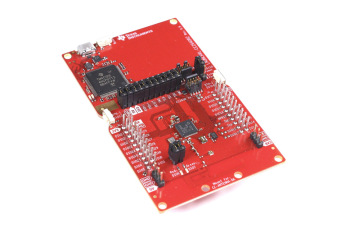
    LAUNCHXL CC2640R2 LaunchPad demo board

    I have been using the Launchpad which contains the Smart Bluetooth CC2640R2F controller, a Serial over USB chip also used for ISP and debugging, 2 leds and 2 user buttons.

    Installation

    Installation was long, on my computer it took a few hours for

    • BLE SDK and
    • code composer studio 7 (CCS 7).

    I made the mistake of choosing my own install directory, this is strongly unadvertised so after some errors I reinstalled everything again. this was on my “old” laptop so it might be quicker for you.

    CCS7

    Code Composer Studio 7 is based on eclipse that I already know from Android Apps development. However, the default view doesn’t show all the features I am used to have but that’s just a matter of configuration.

    Hello World

    As a hello world project I choose the “simple central” example project because it is close to my needs. Later I found the “multi role” project that’s even closer.

    Firstly impossible to compile : missing xxx files. Surely they are not in the directory, but how to get them in? I searched the forum but couldn’t find the answer so I asked for it. One user was quite quick for replying. It turns out you have to import the project API too, called “project name api”. Unfortunately CCS7 does not give you any hint why the files might be missing.

    Help

    I anticipated the problem that comes with every new IDE and system and ask for help. Tutor XYZ* who’s a professional that’s been working closely with and for TI briefly introduced me to the chip family and helped me to start. It is so much more convenient with someone’s help 🙂

    I asked my tutor and several other people, where is the documentation for the “simple central” or “multi role” examples. Surely there is. To that I got only very generic answers, “there isn’t any”, there’s a wiki and there’s a forum just ask everything there.

    The good news is that there is documentation, the bad news, it’s all over the places. So let’s list them:

    – SimpleLink academy. Learn about Smart Bluetooth applied to TI’s stack.

    – TI SDK user guide. I first discarded this document because I don’t understand what examples are doing in the SDK user guide. Still, this is where you will find the most complete and valuable information.

    – c:/ti/sdk_xxx/ directory. Mainly a doxygen help but does also provide information.

    – The forum e2e. This chip family has been around for years, so there should be a lot of common questions already answered. Unfortunately the search tool is not so good.

    – GitHub. Yes, there’s quite a lot of codes and guides that can’t be found anywhere else. I avoided GitHub at first because CCS7 has a cloud based Explorer so the content should be the same. The code is probably but the doc is definitely present in GitHub and missing in CCS7. FAIL. The search results is the best because it is looking into projects from similar controllers too. This brings us to the last point.
    https://github.com/ti-simplelink/ble-sdk-210-extra/tree/master/Projects/ble/multi_role

    – CC2640. Of course most of the examples and documentation for the CC2640R2F is the same as for the CC2640, make sure your searches include both.

    *XYZ. I prefer not to disclose the person’s name until I get approval to do so.

    EDIT 21.03.2017: It seems like TI read in my mind (or got my feedback via XYZ?), they now provide a description for each example directly in CCS’s cloud! It’s however not at the root but you should find it at two parent level from it.

  • Cypress PRoC vs PSoC 4 BLE

    Cypress PRoC vs PSoC 4 BLE

    As for many new starters with Cypress Semi, I didn’t really know the major differences between PRoC and PSoC 4 BLE. In fact I didn’t even realise there was a difference. Yes there is. Luckily enough it is very simple!

    Cypress PRoC vs PSoC 4 BLE

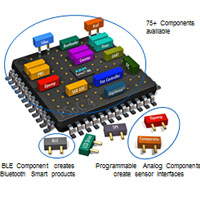
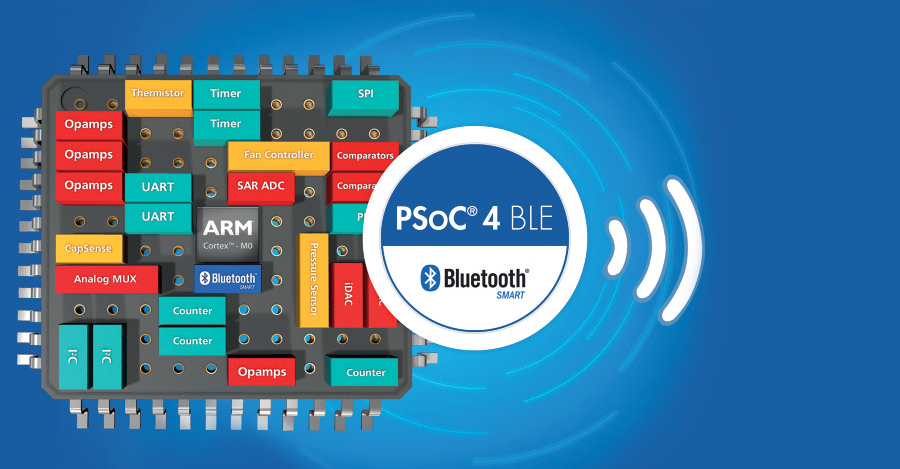
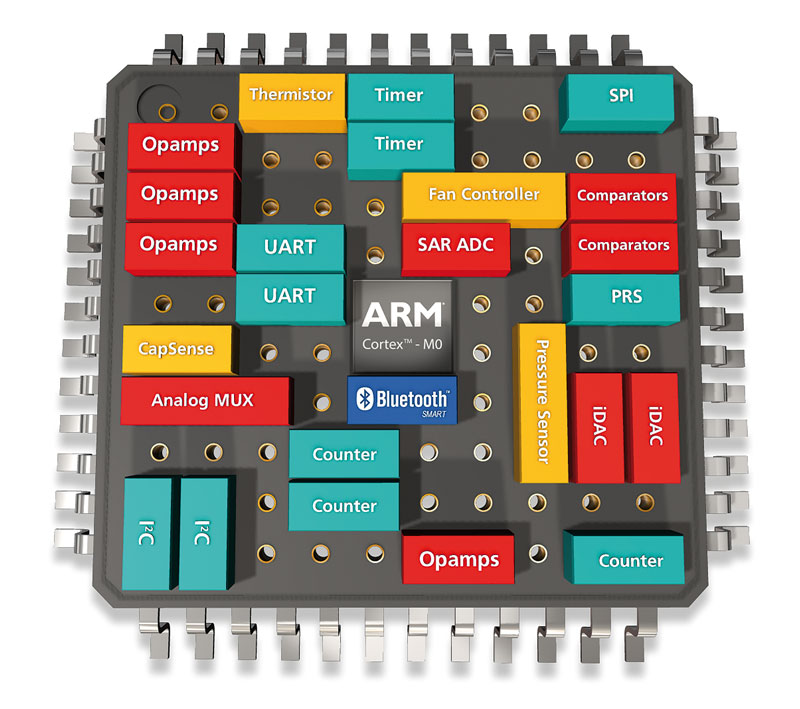
    Cypress PSoC 4 BLECypress’ PRoC (Programable Radio On Chip) can be seen as a subset of PSoC 4 BLE (Programable System On Chip). They have a similar core but PSoC offers a lot more analog blocks than PRoC. In fact PRoC provides only very basic analog blocks; There is no UDB, OpAmps nor Comparator. A simple comparison table can be seen on their Bluetooth Low Energy (BLE) Connectivity Solutions Overview. As an ex-Silicon Company Employee I would immediately think that the chips have actually the same DIE, but this is unlikely, because the ADCs are very different: SAR-ADC for PRoC vs Sigma Delta on PSoC 4 BLE.
    Why I use PRoC?

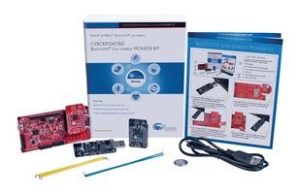
    CYPRESS SEMICONDUCTOR CY8CKIT-042-BLE DEV BOARD, PSOC 4 BLUETOOTH LOW ENERGY I started a development with PSoC 4 BLE and as it turned out the IoT device doesn’t need much analog part. In this case there’s a great price benefit to move to a PRoC module. These totally certified Bluetooth 4.x modules are some of the cheapest on the market in 2016 – 2017. What I really liked is that this ARM®-based chips have been around since 2015. This means it’s up and running, no Beta testing surprises. There’s also a community that can assist should you need it! I’ll go more deeply into my thought in a later post about my choice of Cypress and if this was a good plan or not.

    Thoughts for some hack

    It might be nice to point out that PRoC still has an SAR-ADC and a Capacitive Delta Sigma (CDS) block. The SAR-ADC has a 1Kohm equivalent serial resitor so might not be the best out there. However, could this CDS be hacked for fast analog acquisitions? I would think so, as long as you switch off all the auto-tune mechanism. It is essentially an excellent SNR ADC. To be explored!

  • PCB layout with Target3001! 

    PCB layout with Target3001! 

    After validating the feasibility of my IoT idea, I wanted to start drawing the schematic. There are plenty of PCB layout CAD software. Target3001 was in the list.

    Target3001! logo

    Why Target3001?

    I did not own a licence and prices are high, you better choose the right tool. Fortunately most of them have a free trial, perfect for evaluation before buying. This is how I ended up discarding my first choice: Element14 Circuit Studio made by Altium was a FAIL.

    My second choice went to Target3001 made by IBF in Germany. I used to work a lot with this software at the start of my career. It is not really popular but it is a serious electronic schematic and layout CAD tool. I don’t recall using Kikad or any other open source version because I consider them to be too basic or not professional enough.


    This was back in 2010 and Target3001 already featured the famous 3D view. I remember it to be average and buggy but wanted to see if IBF did any improvement.

    How did it go?

    While the design software is not so beautiful, it is mature and implements a lot of advanced functions. I did experience a few bugs but nothing to worry about.

    Eventually, I ended up drawing the whole electronic schematic and started the layout. The weakest point was applying changes, pushing a track doesn’t automatically push its neighbors as it does in some other CAD tools. In fact, it doesn’t even keep the angles or anything. So if you move things around for any reason the resulting work is very heavy.

    Creating a component is easy once you understand the philosophy, where the coordinates are etc. If you decide to give Target3001 a try you will need to create a component; the default library is lacking of SMT components, but there shouldn’t be any problem concerning through holes.


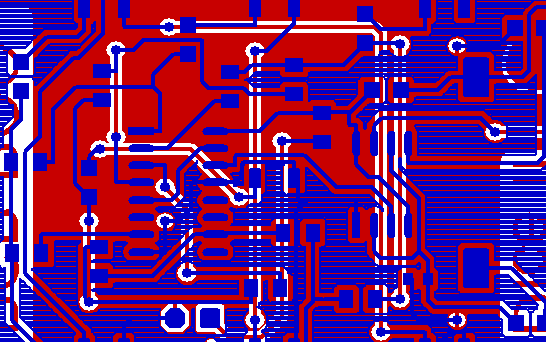
    I was rather unhappy with the default silk screen of the provided library of SMT components, it is way too large. The solution was quite simple. I draw my own silk screen layer, smaller and thinner. I produced the red PCB with PCBGOGO and the result looked nice on the board.


    IoT PCB designed in Target3001!
    My PCB designed in Target3001!

    Would I recommend Target3001?

    I am not sure how easy it is to learn using Target3001 from scratch because I new it already. That said, if you want a cheaper and good electronic design software to design your IoT device, I suggest giving it a try and let me know your thoughts.

  • PCB design with Altium Circuit Studio. FAIL.

    PCB design with Altium Circuit Studio. FAIL.

    Altium Circuit Studio sold by Element14 (Farnell) is a stripped down and cheaper version of the famous Altium Designer.

    I thought I’ll give it a try as they just reduced the price to about 1000$. This makes it competitive with others in the same feature and price range.

    I installed the 30 days trial and started to design the schematic of my IoT project. I have used Altium Designer and even Protel during my studies so not so difficult to remember basic usage.

    I quickly noticed a lot of bugs, crashes and very bad user experience (UX). It finally went to a point that the whole software became unusable due to constant crashes.

    I reported a rather long list of issues that was left without answer. Until another user raised the same major issue on the Element14’s forum: the minimal screen resolution shall be at least 1280 x 1024. Following my complain they finally got in touch but the conclusion is pretty deceiving for Digital Nomads using an ultra portable:

    For any customers using lower res laptops, they get around this limitation by using sw that allows scrolling of the screen. I know it is not the answer the customer is looking for but we do appreciate the candid feedback.

    Altium via Farnell, 2016-11-04

    Altium also assured that the crashes are not common but they don’t have a solution. Trying Circuit Studio was a FAIL for me. I wish it would work as it looks nice and I recommend you to try it. I’ll certainly give it another try with a new computer. But for now it led me to go back towards IBF Target3001 which I used to work with when I started my career.

  • Cypress PSoC Review

    Cypress PSoC Review

    Five months have gone since I first started with Cypress, I have now had the chance to try different aspects of their tools on a personal IoT project. Time do do a Cypress PSoC review.

    Was Cypress a good choice for the IoT project? 

    Cypress’s PSoC 4 family is great I believe, the devices are powerful and enable unlimited possibilities for integrated IoT with the System On Chip. Fewer discreet components means fewer manufacturing problems and cheaper too. Changing the system is as easy as updating the firmware.

    There is one problem that seems to come back every day on forums. That is the system’s complexity. Cypress has tried to addressed this by providing tools, IDE, configuration via schematics design and components, videos, tutos, forums and actually responsive customer service. Some very basic questions on the core’s documentation are unfortunately yet to be addressed. For example, I was asking the following question:

    If I want to add a 10ms delay, how can I find the function that does this?

    We all expect something like:

    Delay_ms(10);

    Yet the function is:

    CyDelay(10);

    Now, where is the documentation, what parameters does this function take?

    Answer from Cypress:

    Let me think about the question.

    We are now a few months later and I’m still waiting for the answer.

    The IDE

    It’s only now that I look at Cypress’s IDE that I realised how great and awesome Atmel Studio is.

    I won’t list the issues here but don’t expect anything user friendly.

    Nevertheless, they do offer a button to export the project to Eclipse [and others], I have tried this but importing it to Eclipse has never worked.

    Was PSoC 4 BLE a good microcontroller choice for the IoT project ? 

    In a previous post I described the way that led me to the Cypress PSoC 4 BLE controller for my IoT device.

    Due to some lack of clear information on their website it was pretty difficult to understand the product road map. I initially choose the PSoC 4 BLE because it is powerful, but it turns out the certified Bluetooth module Cyble-012011-00 has for controller a PRoC, Programable Radio on Chip. This information was not so obvious to find. It is essentially the same chip, minus the programmable analogue components. The good thing is that the effects are minor to none, I did not plan to use the analogue part in my first IoT project anyway. The PRoC is naturally cheaper than the PSoC 4 BLE. It has some limitations on the pin mapping which I didn’t expect but this had no effect too.

    The specs

    What I’ve noticed later is that the power consumption is more important than their competitors, and the analogue routing is limited and finally less flexible than some conventional MCUs. The analogue does however work like a real circuit, without clock at all.

    Should You Be Using Cypress For Your IoT Project? 

    First, don’t be scared. If you have time just take it easy you will learn. If you don’t know much about SoCs it might be hard according to forum members. I’ve had the chance to work multiple times with Altera’s Cyclone at university. So I did learn VHDL, but you don’t need it to start as Cypress has perfectly hidden away the VHDL behind the scenes (components)!

    The good thing is that once you have got something running you just improve it as you go.

    For sure, as advertised, getting started is super easy!

  • Choosing the right IoT Controller 

    Choosing the right IoT Controller 

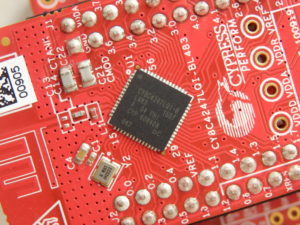
    detail of Cypress PSoC 4 BLE on CY8C4247LQI-BL483
    Cypress PSoC 4 BLE

    To choose the right controller for my IoT idea I start by listing the requirements. Some are essential others just nice to have. The controller is the brain of the system. All performances will depend on it so choosing the right device is essential. It is best to make this choice early to avoid a PCB redesign, rewritting the code, changing the specs.

    Essential requirements

    • Low sleep energy. Several weeks on battery, this implies different following choices.
    • Using Bluetooth Low Energy. This is a very common wireless connection present on most smartphones.
    • BLE certified module, worldwide, because the the low production volume would wouldn’t allow us paying for the certifications.
    • OTA firmware update. This could also be achieved with an external flash.
    • On chip user flash for parameter storage.
    • Capacitive touch sensor controller.
    • Lowest cost.
    • Several GPIOs for peripherals.
    • Easy starter kit to confirm my IoT idea is actually working before going any further.

    Nice to have

    • Battery level measurement.
    • On chip voltage regulator.
    • NFC, for easy pairing
    • For faster time-to-market, it is best to stay with a manufacturer or tools we already have experience with. In my case this was Atmel, Freescale, Microchip, Altera and more generally the ARM Cortex M0 and M4. Howewer, this project is part of my portfolio; I do not mind learning to use new tools and gaining new experience with an unknown manufacturer. In such case, there should be enough material and examples to get us started quickly.

    The candidates

    The following candidates were considered as they were available in July 2016. The market is evolving so there might be something more suitable now.

    • Cypress PRoC/PSoC 4 BLE. Flash 256k.
    • Nordic nRF52832. ADC 12bit 200ksps+ comparator wake up 0.3uA. Flash 256/512. Ram 32/64.
    • ATMEL SAM-B11.
    • Microchip MCP IS1871. BLE4.2.
    • Espressif ESP32.

    My IoT controller choice 

    I was looking for a module with integrated support for capacitive touch sensing. This was not available on Nordic, Atmel, Microchip and Espressif, leaving me with Cypress as only option. To keep a broader choice I looked into external touch sensor controller such as the Microchip CAP1203.

    Once you have selected the candidates it gets down to personal feelings. I’ve worked with the broad Microchip family, then went on Freescale for a few years. As an Ex-Atmel employee I know their products fairly well and some of them in very intimate details. Atmel has achieved the lowest current consumption on ARM. The development environment Atmel Studio is very mature, simple yet advanced using plugins. But this does not mean I’ll stick to something just because I know it well. Who knows me know that the reality is opposite; I like to explore, to discover, to learn, to setup new goals, new challenges.

    Cypress Cyble-012011-00
    Cypress Cyble-012011-00, a PRoC BLE module

    That’s how I choose the Cypress PSoC 4 for the following reasons :

    • Meets all the mandatory criteria.
      • Low sleep energy.
      • Bluetooth Low Energy.
      • BLE certified module available, royalty-free tested Bluetooth IP included.
      • On chip user flash.
      • Proximity sensor.
      • Enough GPIOs.
      • Starter kit CYBLE-CY8CKIT-BLE for quick feasibility check and development.
    • The Cypress PSoC 4 BLE is a very powerful device. I believe that acquiring experience with this ARM based controllers will open new opportunities.
    • Cypress has released the family over a year ago, which means it’s up and running. There’s ample material available, online video, 1o1 lessons, forums and customer service.

    I’ll write a separate post with my feedback with Cypress PSOC 4 BLE after a few months. Was this a good choice?

  • Working at Makerspace Thailand in Chiang Mai 

    Working at Makerspace Thailand in Chiang Mai 

    Makerspace Chiang Mai, Thailand
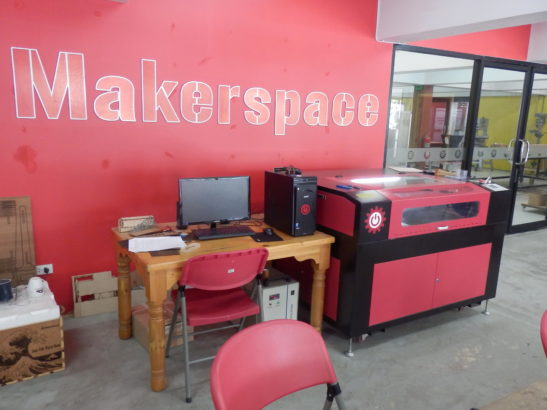
    Laser cutter at Makerspace Thai in Chiang Mai

    For the purposes of my IoT project, I was looking for a makerspace that would allow me to make my IoT prototype. Also called hackerspace, fablad, fabcafé,… some only have basic equipment like a 3D printer and a soldering iron. When it comes to more advanced electronics such as an oscilloscope or SMT reflow facilities there is not so much left. Let’s have a look at Makerspace Thai.

    Why I choose Chiang Mai’s Makerspace Thai

    Makerspace Thailand
    Makerspace Thailand’s 3D Printers

    I have contacted Nati, the owner of Makerspace Thai, on their Facebook page. He was more than happy to help building a toaster reflow oven for SMT prototyping. So I decided to move to Chiang Mai, certainly the home of the biggest digital nomad community in the world, for a month to build the IoT prototype. They also have a temperature controlled solder iron, a hot air soldering station and a basic oscilloscope too.

    And that’s just about electronics, now add a big laser cutter, at least four 3D printers, two CNCs, a whole bunch of tools for woodwork as well as AC and good WiFi! But Nati is speaking about much more equipment, let me know on the comments if there’s something new.

    Chiang Mai Taxi Tuk-Tuk
    Taxi and Tuk-Tuk in Chiang Mai

    The makerspace’s surrounding

    Makerspace Thai is located in the heart of the old town, between cafés and stunning Temples, in a small quiet back street and next to Punspace Co-working space. There’s plenty of space to host any project and giant windows to let Chiang Mai’s daily sun come in.
    The makerspace offer different price package depending on the frequency you need, from a single day use to the full-time membership. Check out their website for the updated rates.

    Are you a Digital Nomad maker?

    After a month spent in their space, I can say it out loud, Chiang Mai’s makerspace is the perfect place for Digital Nomad makers! I might meet you there one day 🙂

    If you are around Malaysia there is a similar place. I’ll talk about the Makerspace located at the ground floor of aCat Co-working in Penang, Malaysia in a separate post.

  • Visiting Chaihuo Makers in Shenzhen, China 

    Visiting Chaihuo Makers in Shenzhen, China 

    Chaihuo MakerspaceMy trip to Shenzhen was aimed at meeting with manufacturers and suppliers for making IoT devices. It is also important to get the feeling of the life in the world capital of electronics and see if I could stay there longer. Knowing what equipment is available in each makerspace helps me to know where I could be located for working remotely as a Digital Nomad. I had the opportunity to visit the Chaihuo Makers. The makerspace also organize conferences, DIY activities and can put you in contact with manufacturers like their mother company Seeed Studio.

    Equipment at Chaihuo Makers

    I could not see their equipment as they are moving the makerspace to a bigger space but they do have a Reflow Toaster Oven for SMT prototyping and might have some more complex electronic equipment as I’ve been told.

    Chaihuo Makers, Building A5
    OCT-LOFT Building A5, Shenzhen, China

    Direction to Chaihuo Makers

    The address is:

    OCT-LOFT A5 Room 227.

    There is no sign outside, follow the building A5 and make your way up to the first floor.

    This place is the showroom for public visits but the actual makerspace is moving to a new address in January 2017. The newly renovated ancient industrial area, OCT-LOFT, is beautiful. All around, you will find countless cafés, restaurants, art galleries, handicraft etc.. It is centrally located and easy access by Metro.

  • Visiting Seeed Studio in Shenzhen, China

    Visiting Seeed Studio in Shenzhen, China

    Seeed Studio LogoWhat is Seeed Studio?

    Seeed Studio is a company that specialized in providing help to makers to bring their hardware ideas to life.

    I am mainly looking for a manufacturer to produce IoT products. But before this, by sending them the design files they can already give me a price estimate for the product. So, we will know what the backer’s price should be for the crowdfunding campaign.

    Seeed Studio’s location

    I had a hard time finding Seeed Studio’s offices, mainly because Google maps is wrong. I used a VPN because it’s blocked but still. The pin is right on the satellite view but at the time of my visit, in Dec 2016, the map view was not aligned! If you can read Chinese just use Baidu Map. Otherwise see bellow.


    Here is the direction in English:

    Tower B 1/F, Shanshui Building, NanshanYungu Innovation Industry Park Liuxian Ave. No. 1183, Nanshan District Shenzhen ,Guangdong P.R.C 518055.


    And in Chinese, useful to ask any local or taxi:

    深圳市南山区留仙大道1183号南山云谷创新产业园山水楼1楼B

    Here are the directions to reach Seeed Studio by metro, it’s pretty easy once you know:

    • Get on Shenzhen’s metro line 5.
    • Get off at university town exit B.
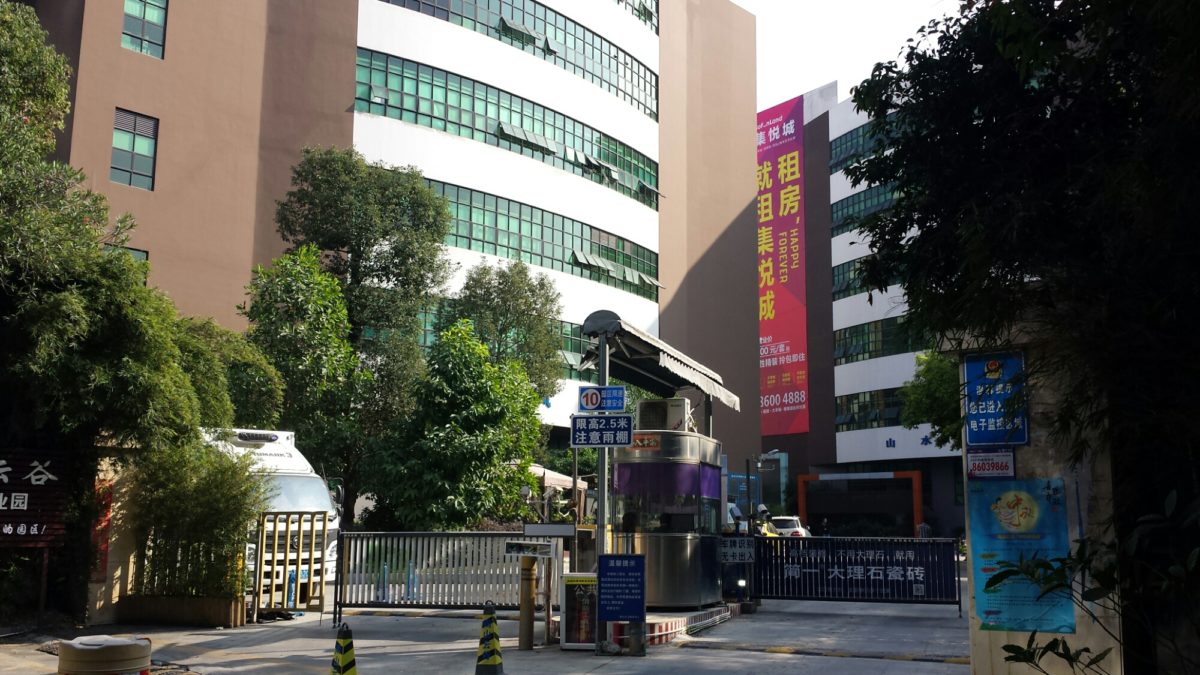
    • Walk straight until you reach this entrance:
    • Seeed Studio’s building IS NOT A TOWER! Pass on the left of the fountain and follow the building at your right, the entrance will be towards the end to your right.

    Seeed Studio’s services.

    Seeed is a hardware innovation platform for makers to grow inspirations into differentiating products. By working closely with technology providers of all scale, Seeed provides accessible technologies with quality, speed and supply chain knowledge. When prototypes are ready to iterate, Seeed helps productize 1 to 1,000 pcs using in-house engineering, supply chain management and agile manufacture forces. Seeed also team up with incubators, Chinese tech ecosystem, investors and distribution channels to portal Maker startups beyond.

    seeedstudio.com, Dec 2016.


    Of course I am concerned by sending them the design files. They are happy to sign an NDA but China is just so famous for copying everything, can we trust them? I don’t know but it seems like a lot of people have already trusted them.